

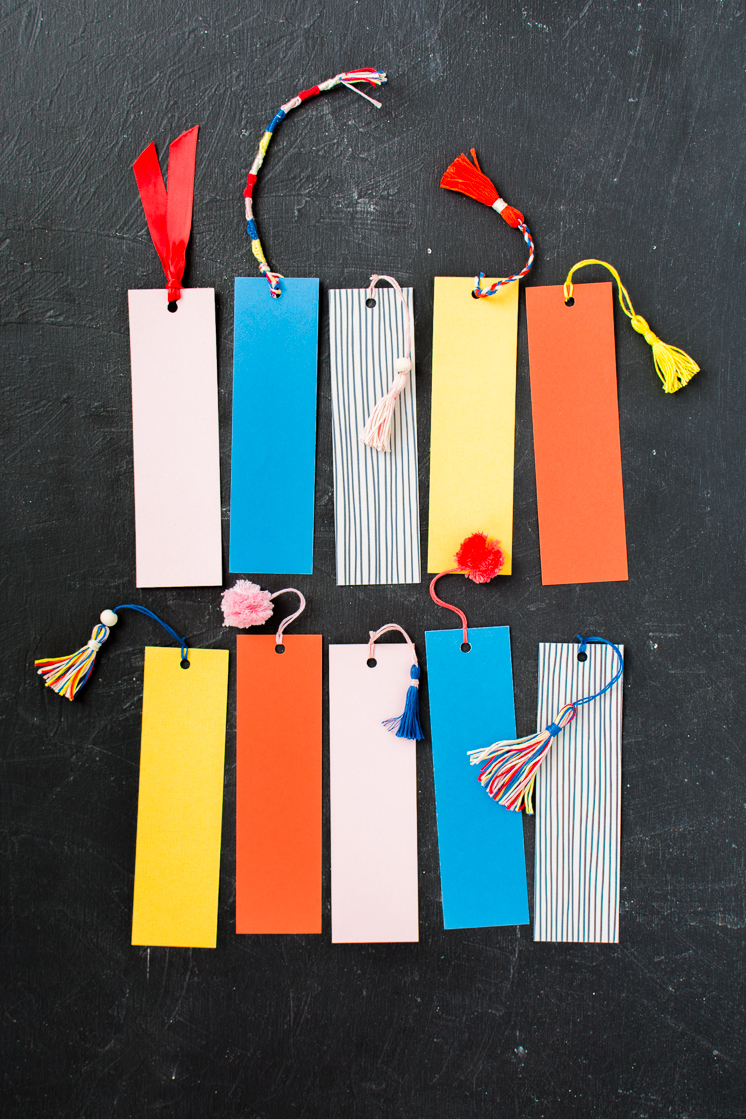
 Many of you may not know that we have a monthly book club here at Lars. If you’re a fan of reading or want to start reading more, check it out! In addition to discussion questions, we offer a coordinating art print and bookmark by a different illustrator each month (See September’s book art here). Let me tell you, each illustrator always creates the most lovely illustrations that capture the book of the month perfectly. Make sure to check out our Book Club archives to take a peek. For the bookmarks, we like to add a small tassel or bobble to finish it off, but we’ve never shown you how to create it for yourself Shame on us! So today we’re going through 10 varieties of DIY bookmark tassels and pom poms that you can make to jazz up your bookmarks! Don’t stop there though, think key chains, and clutches, and anything else that needs a little something extra!
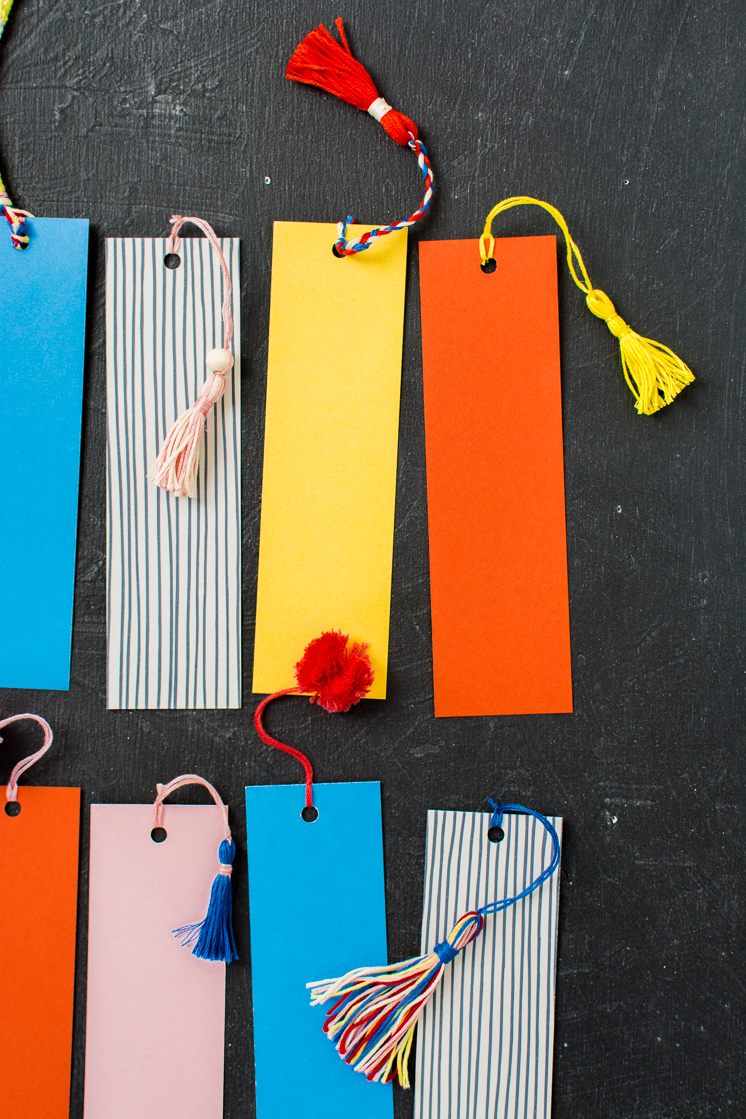
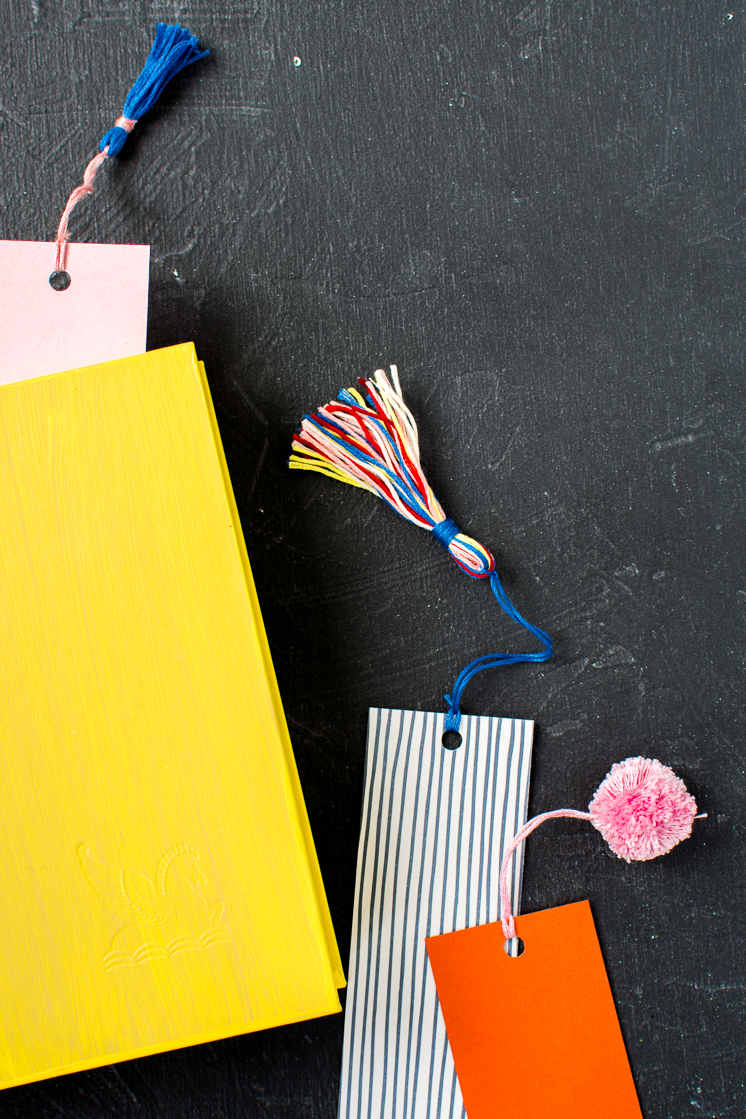
Check out all the tassel variations
 DIY Bookmark Tassels
 DIY Bookmark Tassels
Materials:
- Embroidery floss in desired colors
- Scissors
- Hole punch
- Hot glue gun, optional
General Instructions:
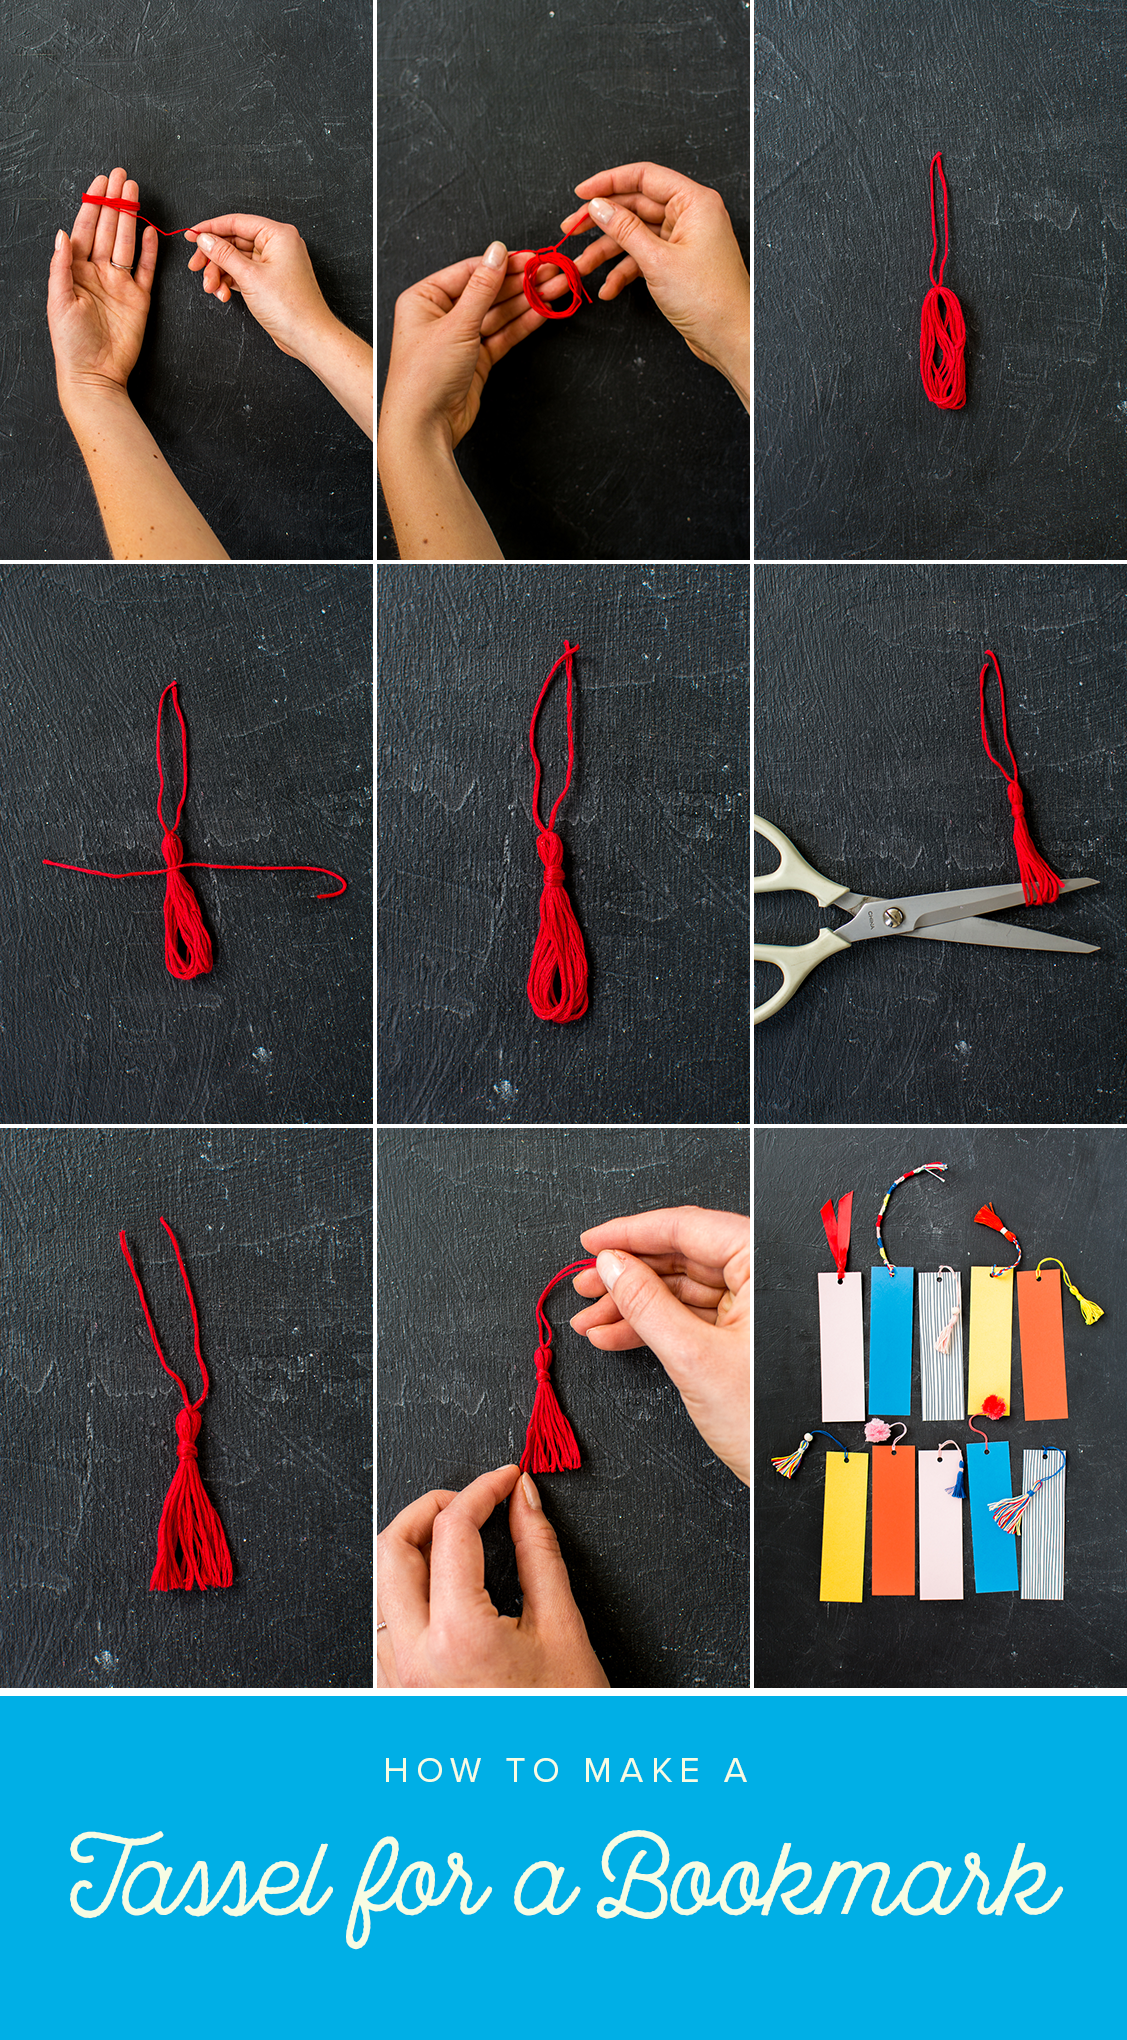
For a tassel
- Choose one or multiple colors of embroidery floss and wrap a piece of floss around two or three fingers, depending on how long you want your tassel to be.
- Wrap the string(s) around your fingers until you have 20-35 strings.
- Slip the loop of strings off your fingers and tie a knot at the top of the loop, securing all the strings together. Leave a long tail to use to connect to your bookmark.
- With another piece of embroidery floss, tie a knot about ¼-inch to ½-inch below your initial knot. Then cover this knot by wrapping the embroidery floss around the tassel until you’ve got a tight coil of embroidery floss. Secure this string with a tiny dot of hot glue.
- Cut your loops of string and trim to make them all even.
- Punch a hole in the top of your bookmark, slip the long string through the hole and tie off.

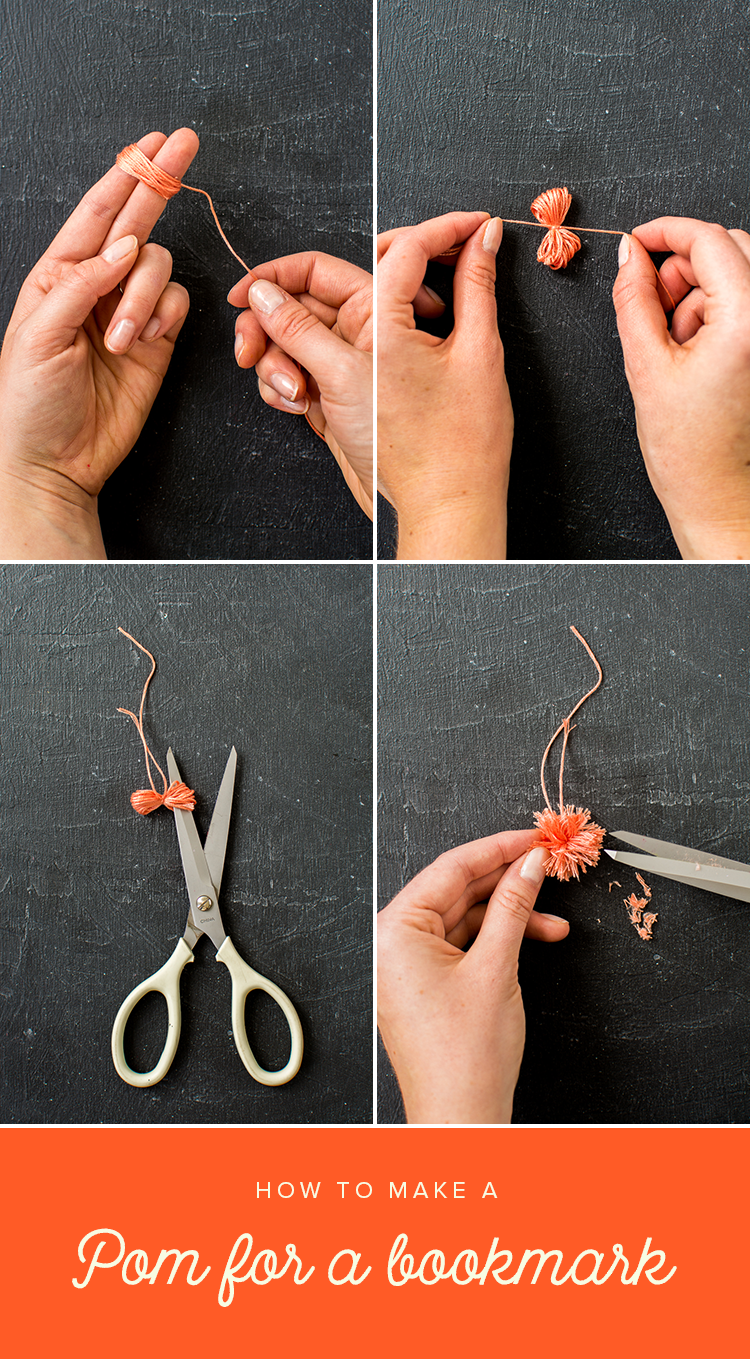
For a pom pom
- Wrap the thread around 2 fingers, and increase the number of times you wrap the thread around to 40-50.
- Tie the knot in the middle of the loop, leaving a tail long enough to string through the hole punched on your bookmark.
- Cut the loops on both sides
- Trim to fluff up

For a ribbon addition
- Punch a hole in your bookmark
- Fold a 3-4 inch piece of ribbon in half, and stick both ends through the hole.
- Before pulling all the way through, stick the two ends through the loop of the ribbon and pull tight so the knot slides down to the base of the bookmark.
- Trim ribbon edges at an angle


For a friendship bracelet
- Gather as many embroidery floss colors as you’d like
- Tie 8″ strands of the embroidery floss together and seal to a surface with tape
- With the strand on left (white), make a number “4” and tie around the remaining colors up to the top of the main knot 12 different times before discarding it to the right
- With the next color (red), repeat the same process 12 times and discard to the right.
- Repeat to each color.
- When done with the length that you’d like for your tassel, insert all the colors into the hole lunch and secure with a knot

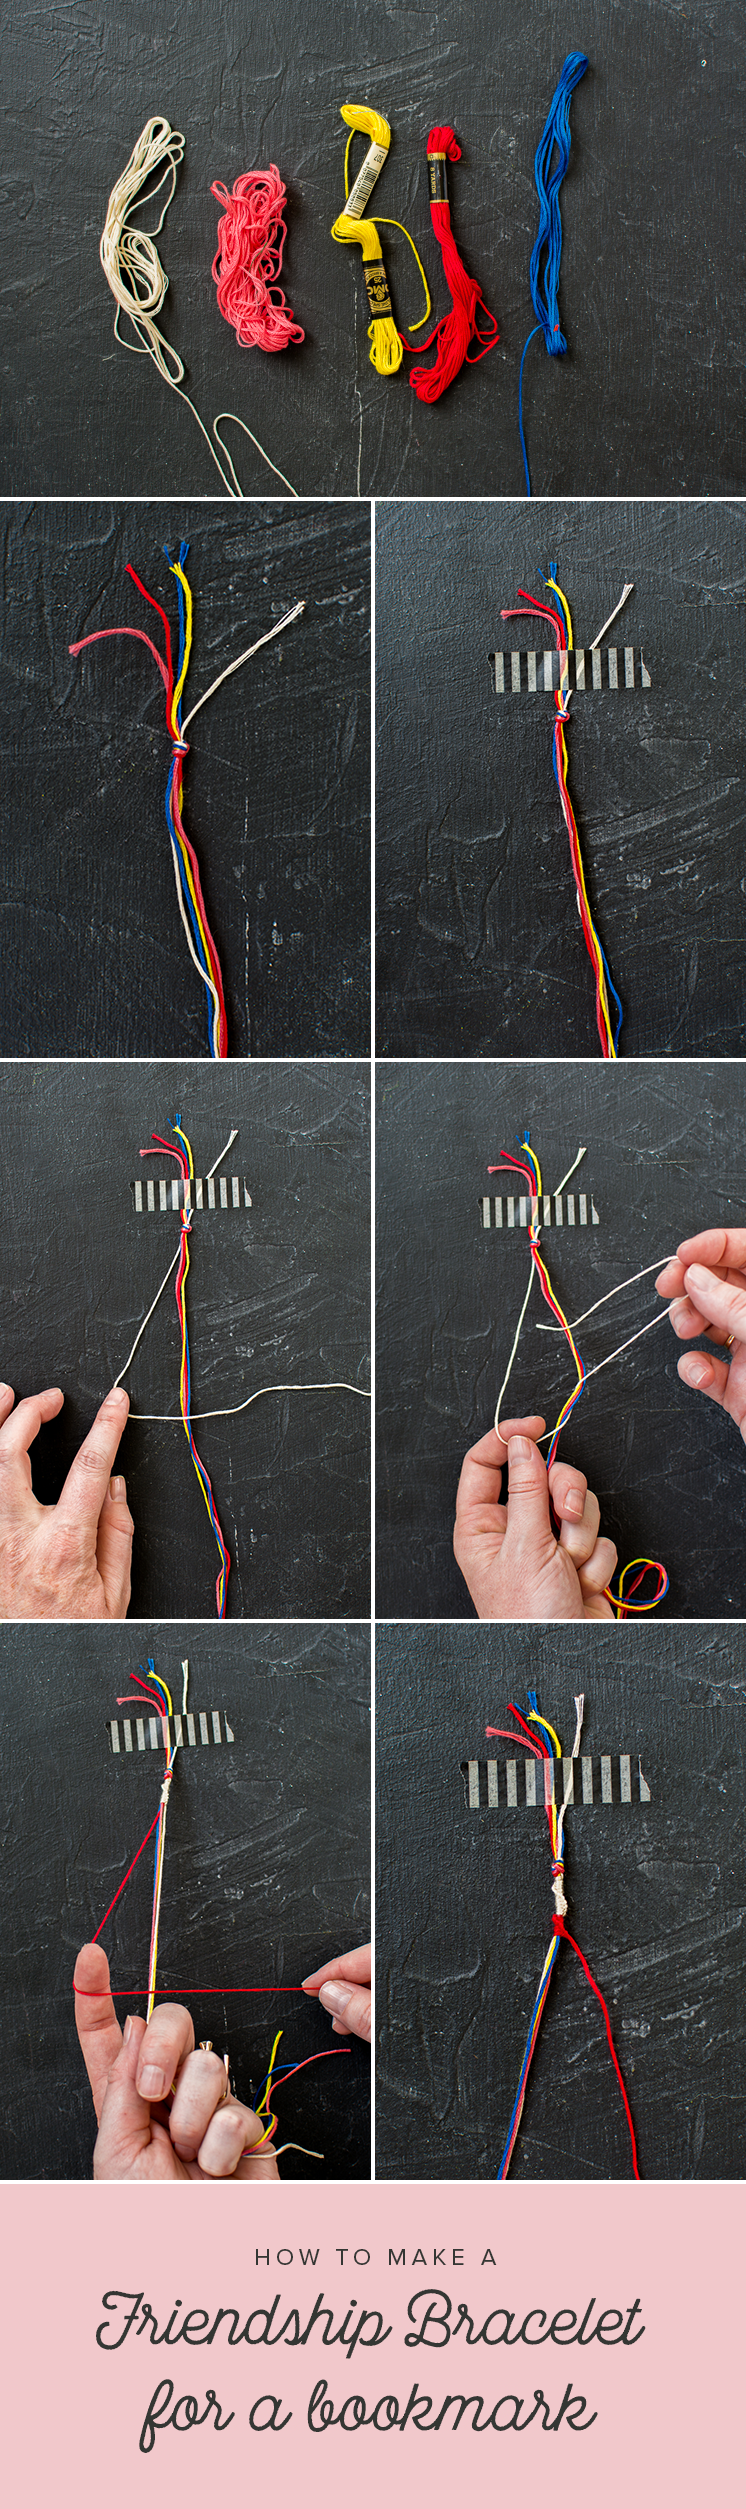
*Add beads, include a braid or other wrap, and use multiple colors to add variation
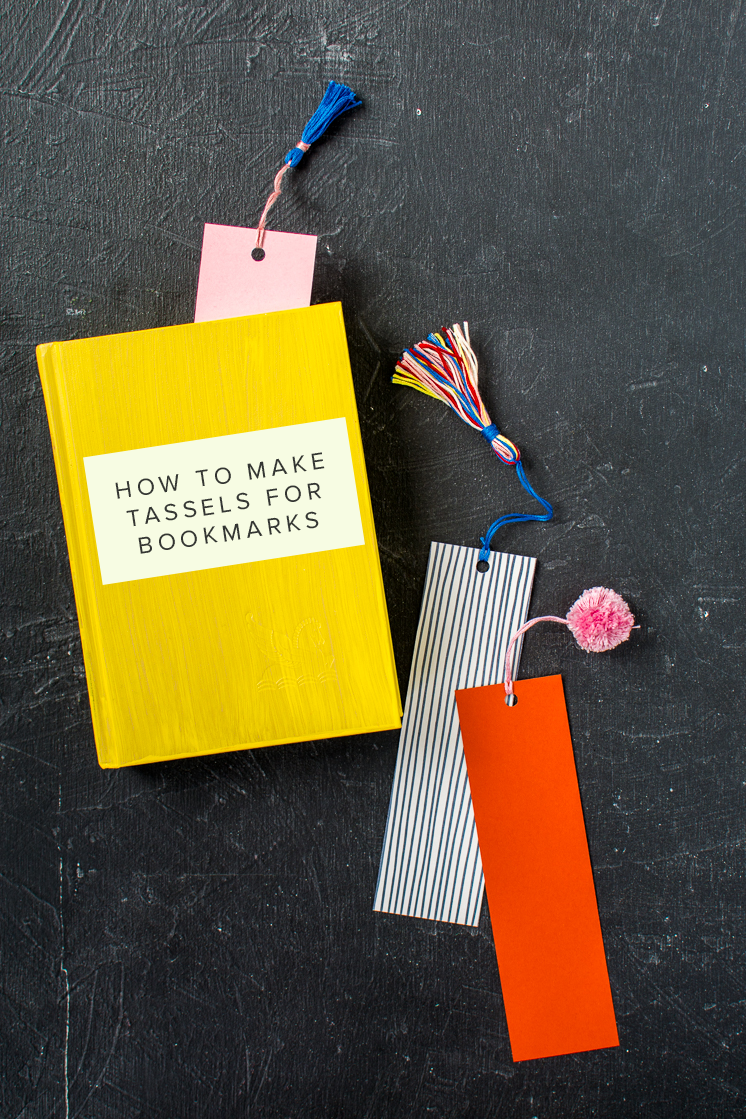
See how we’ve created beautiful custom tassels for each of our Book Club books.
Photography by Clara Jones | Crafting by Rebecca Hansen
Comments