
Want to add instant classic charm and a breath of fresh greenery to your space? These DIY topiary trees are the answer. Perfect for flanking a fireplace, brightening an entryway, or adding life to a shelf, they deliver high-end style on a seriously low budget. In this step-by-step guide, you’ll learn how to transform basic terra cotta pots into aged pottery, create a realistic trunk from foraged branches, and assemble lush, foolproof foliage. Let’s create some elegant, easy greenery that lasts all season long.
Let’s Make Topiaries!
OK, OK… I know it’s January, but I miss my garden and need to bring a little bit of the outdoors inside to brighten my mood!! To be honest, I become a plant hoarder every January…oh, I’m not kidding…I’ve never met a plant I haven’t wanted to put in my carriage!! I just feel better when I have plants and flowers around me during this long stretch of winter.
So, for a fun project, I wanted to make some topiaries to spruce things up around here. I wanted them to be easy and affordable to make…let’s see if I can do it!
This post may contain affiliate links, which means I may earn a small commission if you make a purchase through my links, at no extra cost to you. Read my disclosure policy here.
Supplies for Making Topiaries
Materials for this Project
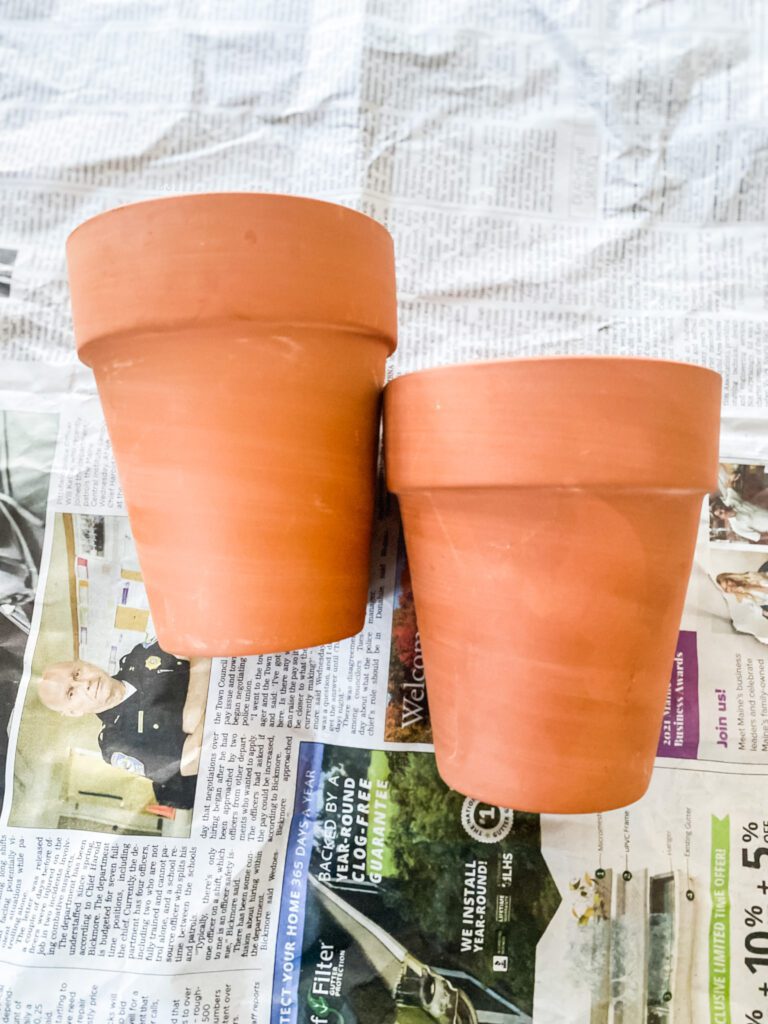
- Small Terra Cotta Pots
- Spackling Compound/ Paint
- Greenery and Floral Picks
- Sticks
- Floral Foam Block
- Floral Tape & Floral Wire
Step 1. Preparing the Terra Cotta Pots
I had a few terra cotta pots in my stash already, but they are readily available at craft stores year-round.
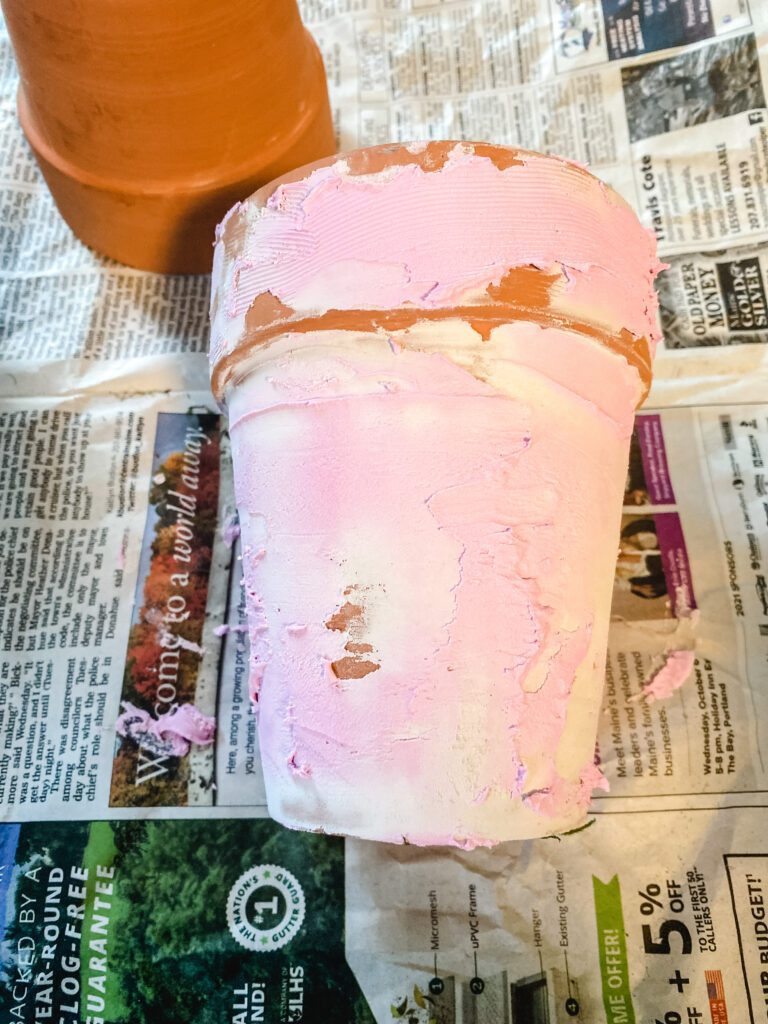
If you love the look of timeworn, vintage pottery, this quick trick is for you. Using a putty knife, spread a thin, uneven layer of spackling compound over the surface of your terra cotta pot. The key is to leave some areas of the clay exposed—don’t cover it completely. The spackle goes on pink but will dry white, creating a beautifully textured, chalky base for your paint.

Step 2: Paint, Antique, & Prep the Pots
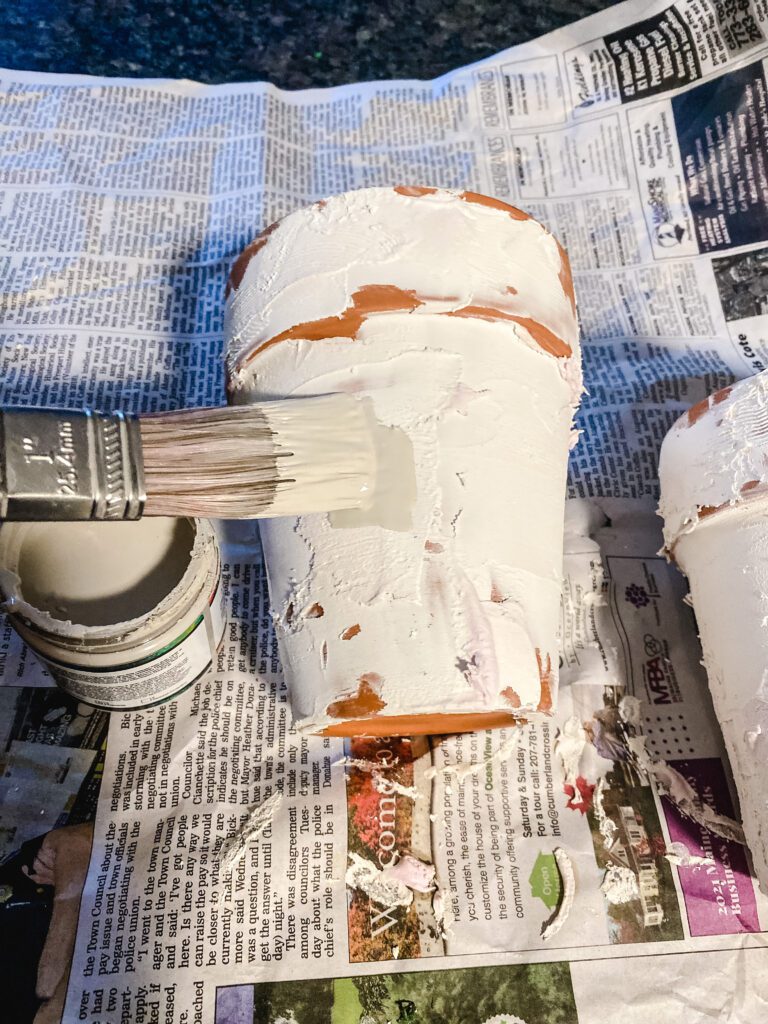
- Paint: Once the spackle is completely dry, paint the pots with an off-white chalk paint. Let the paint dry thoroughly.
- Antique: To accentuate the texture and create an aged look, lightly brush a dark antiquing wax (like Waverly Antique Wax) over the painted surface. The wax will settle into the crevices, highlighting the spackle’s texture.
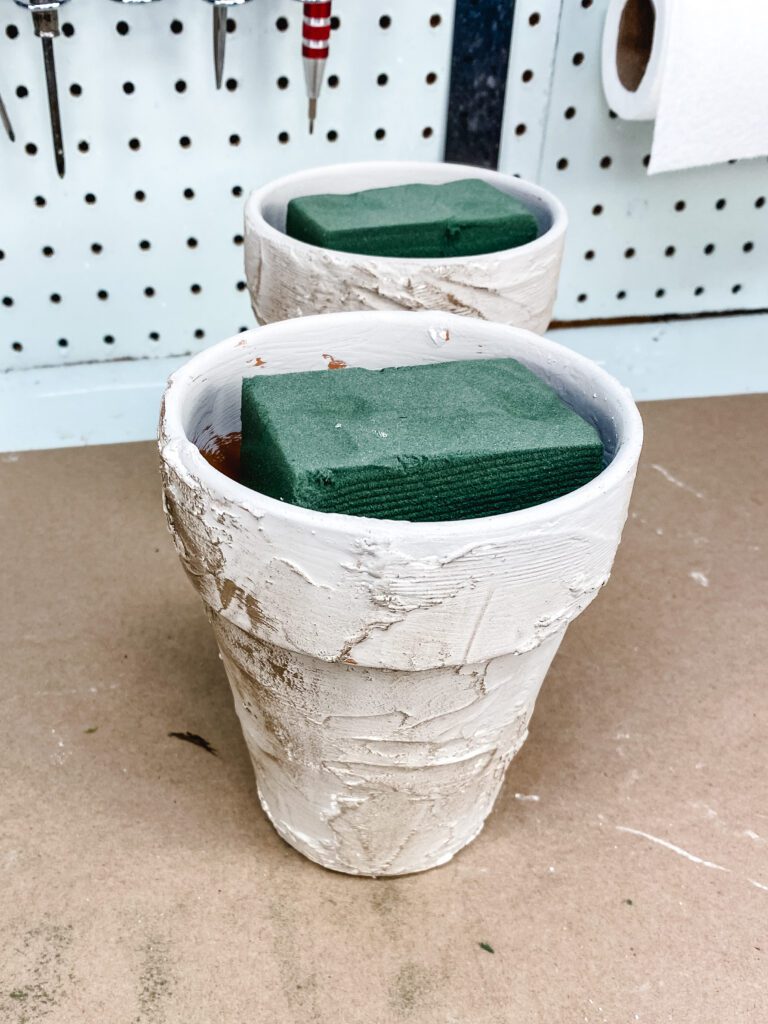
- Insert Foam: Finally, cut a piece of floral foam from a large block and firmly press one into the top of each prepared pot. This will serve as the base for your topiary.
Step 3: Building the Topiary

1. Create the Trunk: Cut two thin sticks from your yard to about 1 foot each. Secure them together at the top and bottom with small pieces of floral wire twisted tightly.


2. Attach the Greenery: Using four greenery picks, attach the first one to the top of the bundled sticks. Wrap brown floral tape tightly around the stems to secure it. Continue adding the remaining picks one at a time, wrapping the tape continuously down the “trunk”

3. Assemble & Finish: Insert the base of the sticks firmly into the center of the floral foam, pushing down until secure.
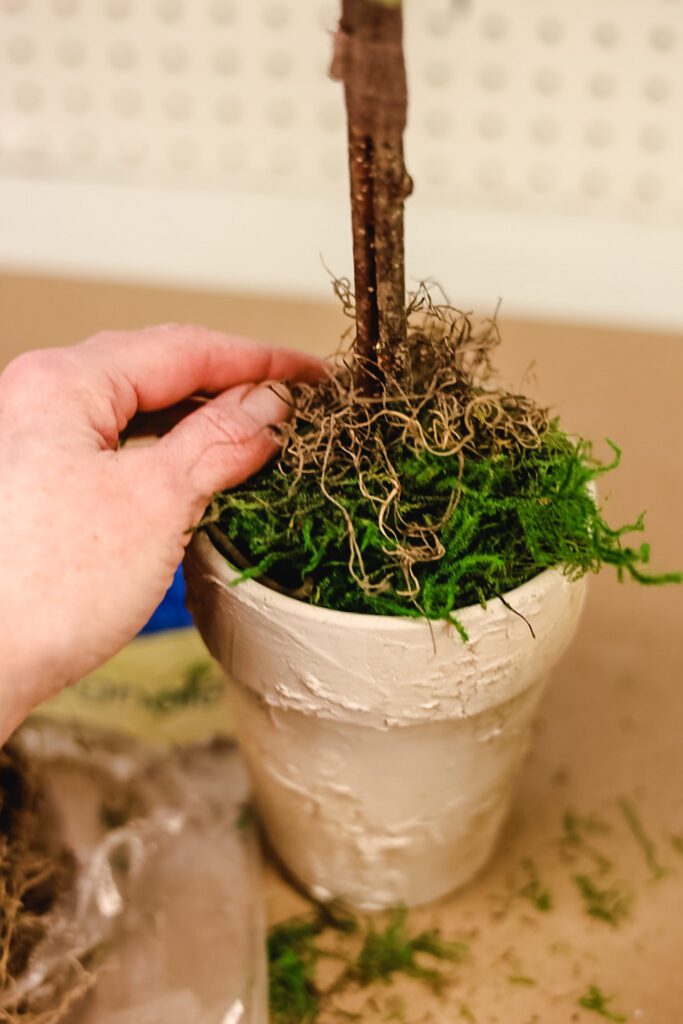
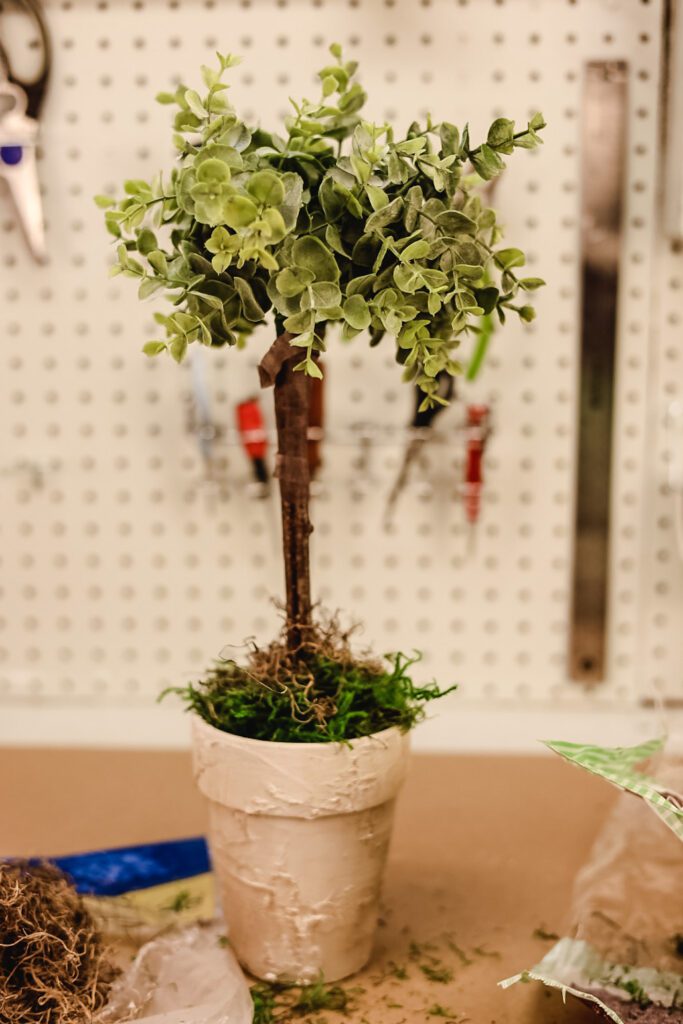
To cover the foam, pack green moss around the top of the pot, pressing some down into any gaps. For a final rustic touch, tuck a small bunch of Spanish moss around the base of the sticks.
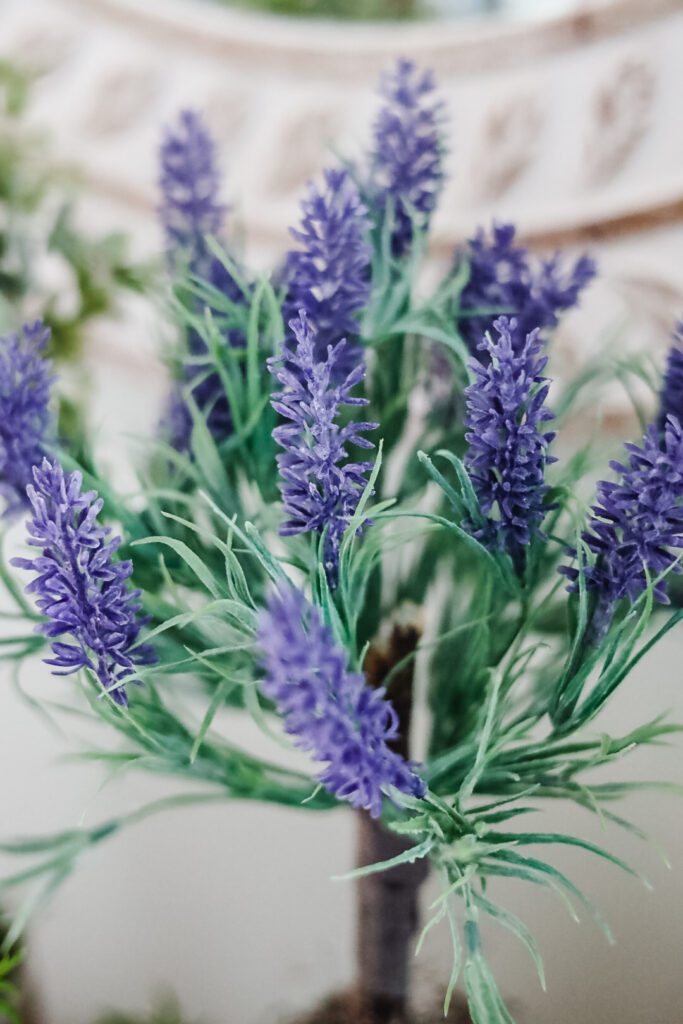
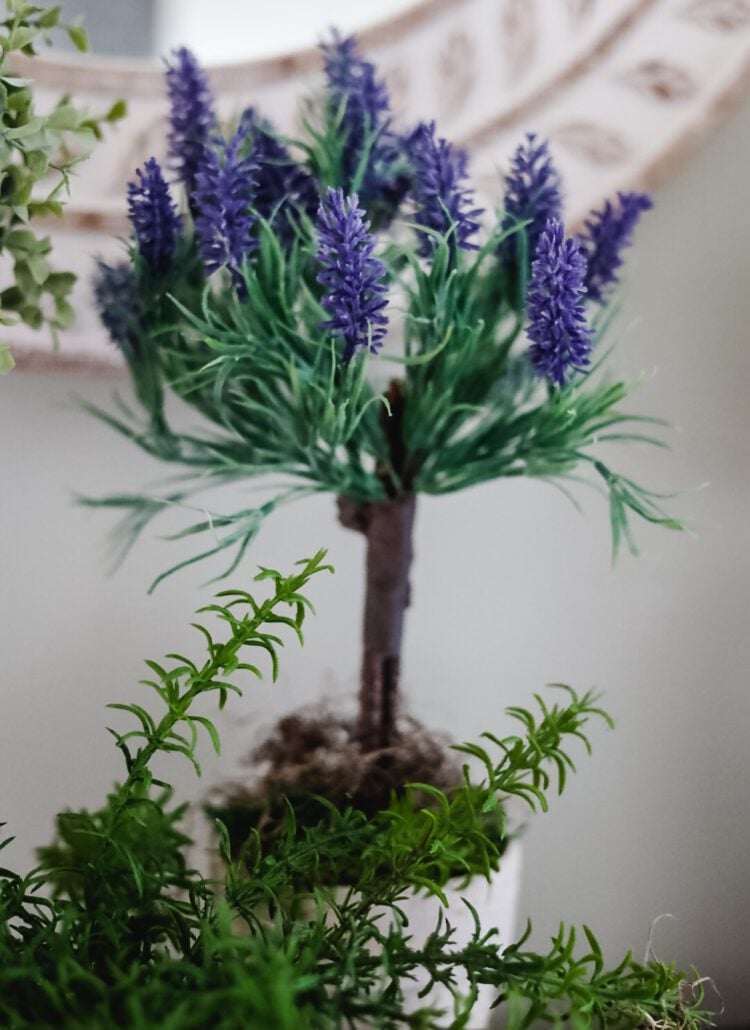
Variation: Make A Lavender Topirary
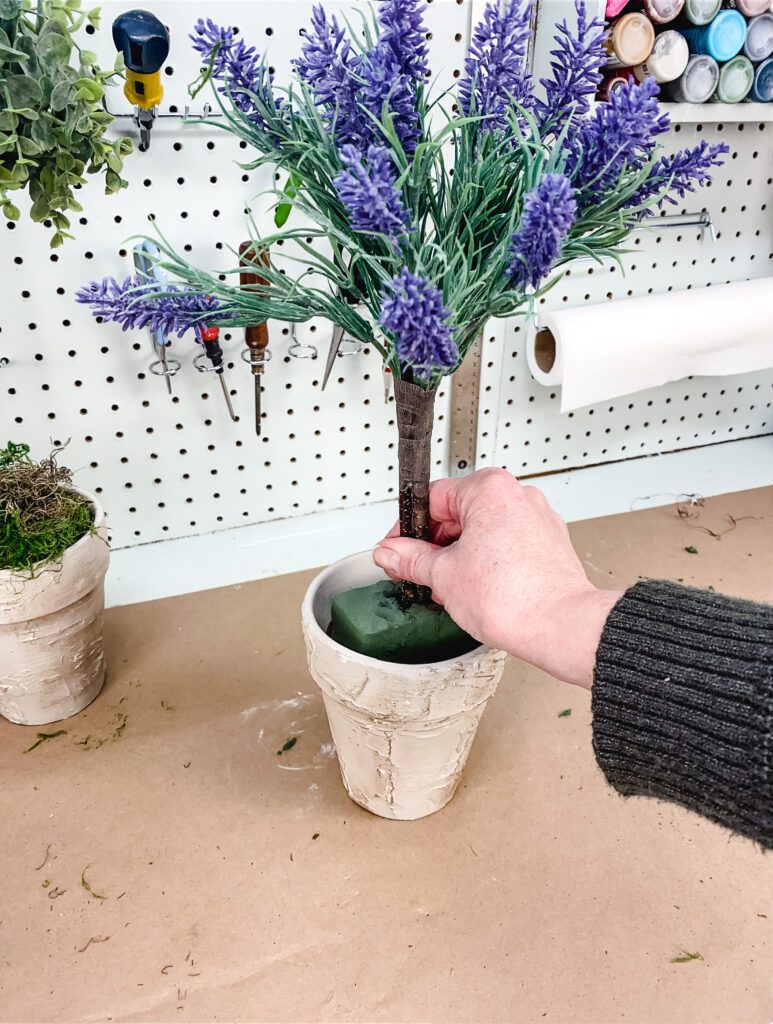
For a second topiary, I wanted to make a lavender one. I followed all the same steps as the one I made using the greenery picks, but this time I’m using 4 lavender picks.
After I had the topiary together, I shaped the lavender picks to mimic real lavender topiaries. I bent the picks into almost an L shape.
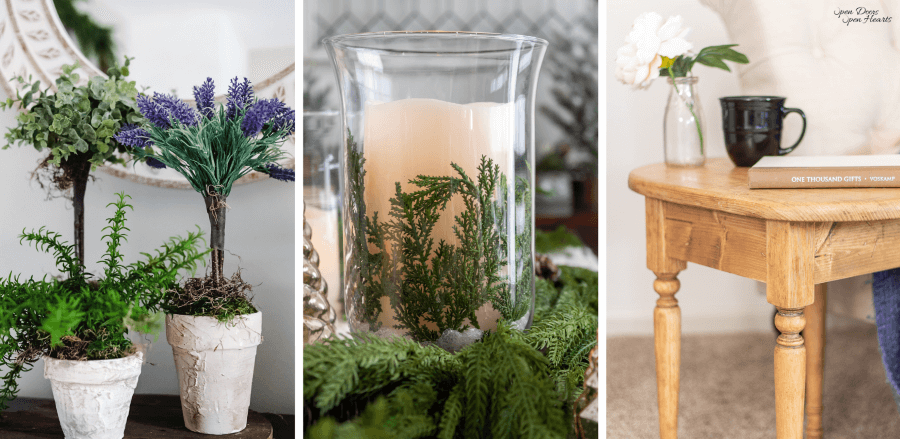
Finished Topiaries
And here’s the finished topiaries! Didn’t they come out pretty?? So, for under $20, I made 2 unique topiaries that I can use year-round in my home.

I had another small pot that I used to make a short topiary. This time, I popped a herb stem right into the floral foam to make it look like a plant.
It’s always better visually to have an odd number of items placed together when you are decorating.
These DIY topiary trees are proof that a few simple materials can create a significant impact. With their aged pots and naturalistic trunks, they offer an enduring style that works in any season.
I hope this tutorial inspires you to create your own. For more projects that blend rustic charm with easy execution, explore more of my DIY decor ideas
Share Your Make: If you try this project, please leave a comment below or tag me on social media—it makes my day to see what you create!
xo, Jennifer
my crafting must-haves
shop my amazon store
Love projects like this? Don’t miss out! Join my newsletter family for more cozy, budget-friendly DIY ideas delivered right to your inbox. You’ll get exclusive tips, early access to tutorials, and all the inspiration you need to make your home feel handmade and heartfelt.
More Winter DIYs To Try!
Cottage On Bunker Hill | Midwest Life And Style | Open Doors Open Hearts
Vintage Home Designs | Loving Grace Home | Amy Sadler Designs


These are so pretty and perfect for this time of year when we need a little greenery in our homes! Thank you so much for sharing at Tuesday Turn About! Wishing you a wonderful weekend! xo
Yes, between these topiaries and my houseplant addiction it’s pretty green around here!!
These topiaries look SO good!!! I love the spackle technique you used on the pots! It’s one of my favorite things to make!
Thanks friend!!
I love both of these, but especially the lavender. You always make things look so easy! Nice job, friend!
Chuck is really behind the scenes doing it all….LOL…LOL
Jennifer these turned out darling! I love the variety and I miss my garden too! Beautiful as always my friend!
Well, it will be fun seeing what you do at the new house this year!
These are very pretty. I’ll be starting spring crafts in 2 weeks.
I have a laundry list
Me too Cindy!! Thanks for stopping by!
These are precious! I never would’ve thought of this so thank you for sharing!
You would have…you have a crazy creative brain!!
These are beautiful! I love how you aged the pots. The texture they have is awesome!
Thanks Emma!! I’m still swooning over your photography style…it’s memorable!
Oh, I love topiaries and these are perfect for brightening winter. Love the spackling technique!
Thanks Leslie!! I need a little brightening up here right about now!
These topiaries are so pretty Jennifer. Love the pots too! I’m definitely going to use that method to transform terracotta pots. Thanks for sharing! Pinned!!
Thanks! Yes, super easy…and cheap way to get vintage-looking pottery.
Jennifer, your topiaries turned out so pretty! I love the lavender one. Such a breath of fresh air during the dreary winter months. Hope you are staying warm and cozy, friend!
I’m like a groundhog right now…everyone will see me in March!!
Love the topiary DIY! It’s beautiful Jennifer!
Thanks Stacy!
Jennifer,
These are so cute. I love topiaries.
Thanks Rachel! I needed to brighten up my kitchen a little bit.
These are so cute Jennifer! Love the pots!
Thanks Michele!!
Hi Jennifer. Love the topiaries and you have inspired me to do this. I have several evergreens and also my lavender is looking great even in January. I’m going to go forth and do this with living plants. I’ll let you know how they turn out.
Love your blog. .
OOh, yes definitely do it and send me a picture! I can’t wait for fresh lavender in the garden.
Jennifer! I’m with you. I need a little bit of life in my house to get me through until March/April when I can get back outside into the garden. PS last night Justin and I were talking about LAVENDER!! We’re gonna try to add a bunch of it to our garden this year ❤
Yes, grow it!! I had a big pot by my play area and the little kids would all rub it on their hands and sniff before their parents came…calmed them down a little!!