The Sky Rider drone is a popular choice for beginners and enthusiasts alike. Its easy-to-use features make it perfect for capturing stunning aerial photos and videos. Still, before you can start flying, it’s crucial to understand how to use the Sky Rider drone properly. Read this article to learn.
Unbox and inspect your Sky Rider drone. Charge and install the battery, then attach the propellers. Power it on, pair with the controller, and calibrate. Do pre-flight checks, then take off. Practice basic maneuvers, use the camera if available, and land safely. Then, power off and store it well.
This guide will take you step by step through using a Sky Rider drone, from unboxing to safe flying tips. By the end, you’ll be confident handling your drone and enjoying a smooth, safe flight. Read it to learn more.
Table of Contents
Key Takeaways
- Power On: Press the power button to turn on your Sky Rider drone and prepare for flight.
- Pair Controller: Sync the remote with the drone by pressing the pairing buttons for quick and easy control.
- Fly Safely: Use the joysticks to navigate, keeping the drone within your line of sight at all times.
Step-By-Step Guide To Using A Sky Rider Drone
Ready to fly your Sky Rider drone? This step-by-step guide will walk you through everything you need to know, from unboxing to safe flying. Follow these easy instructions to set up your drone, learn basic controls, and enjoy your first flight with confidence. Let’s get into the details.
Step 1. Unboxing And Inspecting Your Drone
When you first unbox your Sky Rider drone, make sure all components are present. These typically include the drone, controller, battery, propellers, charger, and user manual. Inspect each part for any visible damage. Check that the propellers are intact, the battery isn’t swollen or leaking, and that there are no cracks on the drone’s body. This initial inspection is crucial as it ensures that your drone is safe to use and that all necessary components are available.
Step 2. Charging The Battery
Before you can fly, your drone’s battery must be fully charged. Plug the drone’s charger into an outlet and connect the battery. Most Sky Rider drones come with an indicator light that shows when their battery is charging and when that’s fully charged. This charging can take a couple of hours, so it’s important to do this step beforehand. A fully charged battery ensures longer flight times and prevents mid-air power loss.
Step 3. Installing The Battery
Once the battery is charged, insert it into the designated slot on the drone. Make sure it fits securely and clicks into place. A loose battery can cause power interruptions, leading to crashes or loss of control during flight. Always double-check that the battery is properly installed before proceeding to the next steps.
Step 4. Installing The Propellers (If Not Pre-Installed)
When your drone’s propellers aren’t already installed, you’ll need to attach them. Refer to the user manual for instructions, as incorrect installation can affect flight performance. Typically, propellers are marked with letters or colors to match specific motor arms. Tighten them firmly, but be careful not to overtighten, as this can damage the threads.
Step 5. Powering On
To power on your Sky Rider drone, press the power button, usually located on the drone’s body. The drone’s lights must start flashing, indicating it’s ready to pair with the controller. Powering on correctly is essential to ensure that all systems are functioning properly before takeoff.
Step 6. Pairing The Drone With The Controller
Pairing the drone with the controller is crucial for effective control. Turn on the controller and follow the pairing instructions in your manual. Usually, this involves pressing a specific button or combination of buttons on both the drone and controller. Once paired, the flashing lights on the drone will become steady, signaling that the connection is successful.
Step 7. Calibrating The Drone
Calibrating your drone is necessary to ensure stable flight. Calibration adjusts the drone’s internal sensors, like the gyroscope and compass, to ensure accurate movements. Follow the manual’s instructions to perform calibration, which often involves placing the drone on a flat surface and rotating it in specific directions. Proper calibration prevents erratic flight behavior.
Step 8. Pre-Flight Checks

Before taking off, conduct a series of pre-flight checks. Ensure that the propellers are secure, the battery is fully charged and installed correctly, and the drone is calibrated. Check that there are no obstacles in your immediate surroundings, and make sure the weather conditions are suitable for flying. These checks help prevent accidents and ensure a smooth flight.
Step 9. Take-Off
To take off, place the drone on a flat surface, preferably outdoors in an open area. Use the controller to slowly lift the drone into the air by pushing the throttle stick upward. Start with a gentle ascent to a safe height, usually about 3 to 6 feet, until you get a feel for the controls. Taking off slowly and steadily helps you maintain control and avoid sudden movements that could lead to crashes.
Step 10. Basic Flight Maneuvers (Hovering, Moving, Rotating)
Once in the air, practice basic flight maneuvers. Use the left joystick to hover in place or to move the drone up and down. The right joystick controls the forward, backward, and side-to-side movements. You can also rotate the drone by pushing the left joystick left or right. Spend some time getting comfortable with these controls in an open area before attempting more complex maneuvers.
Step 11. Using The Camera (If Applicable)
When your Sky Rider drone is equipped with a camera, learn how to operate it before your flight. The camera is usually controlled through the controller or a smartphone app. You can capture photos and videos by pressing the appropriate buttons. Make sure the camera angle is set before takeoff, as adjusting it mid-flight can be challenging. Practicing camera use on the ground will help you capture better footage in the air.
Step 12. Landing The Drone
To land your drone, slowly decrease the throttle stick to lower the drone toward the ground. Choose a flat, clear area to land. As the drone descends, make minor adjustments with the joystick to ensure a smooth landing. Once the drone touches down, fully release the throttle stick to power down the propellers. A controlled landing minimizes the risk of damage.
Step 13. Powering Off Drone & Controller
After landing, turn off the drone by pressing the power button. Then, power off the controller. Turning off the drone first ensures that there’s no unintentional signal sent to the propellers, which could cause them to spin unexpectedly. Powering off both devices in the correct order ensures safety and prolongs the lifespan of your equipment.
Step 14. Post-Flight Checks
After your flight, taking care of your Sky Rider drone is important. Post-flight checks help keep your drone in good condition for the next use. This step will guide you through inspecting the drone, removing the battery, and storing everything properly to ensure it’s ready for your next adventure.
Inspect The Drone
After flying your Sky Rider drone, carefully inspect it for any damage. Look closely for cracks, loose parts, or anything that seems out of place. Pay attention to the propellers, body, and landing gear. Finding small problems now can prevent bigger issues later, like crashes or breakdowns. Regular inspections keep your drone in good shape, ensuring safe and enjoyable flights every time you use it.
Remove The Battery
After your flight, carefully remove the battery from your Sky Rider drone. It’s important to let the battery cool down before recharging or storing it. This cooling period helps prevent overheating, which can damage the battery and reduce its lifespan. By taking the battery out and letting it cool, you keep it in good condition. This ensures your drone stays powered up and ready for your next adventure.
Store Properly
After flying, store your Sky Rider drone, controller, and accessories in a safe, dry spot and put them in a padded case to prevent scratches or breaks. Keeping your drone in a good place helps protect it from dust and damage so it’s ready for your next flight. Proper storage keeps everything in great shape and ensures you have no problems when you want to use your drone again.
Tips For Safe Flying
Flying your Sky Rider drone safely is important to avoid accidents and keep it in good condition. These tips will help you understand the key things to remember, like following local rules, avoiding obstacles, checking the weather, and keeping the drone in sight. With these tips, you can enjoy safe and fun flights every time.
Follow Local Regulations
Always be aware of and follow local regulations regarding drone usage. This includes restrictions on where you can fly and the maximum allowed altitude. Some areas can require you to register your drone or obtain special permissions. Following these rules helps you avoid legal issues and keeps your flights safe.
Avoid Obstacles
When flying your Sky Rider drone, always stay away from obstacles like trees, buildings, and power lines. Even small things like branches can damage your drone or make it crash. Keeping a safe distance helps you avoid accidents and keeps your drone safe. By flying in open areas without obstacles, you can enjoy a smoother and more controlled flight. This ensures your drone stays in good shape and your flights are fun and worry-free.
Check Weather Conditions
Before taking your Sky Rider drone out for a flight, it’s important to check the weather. Avoid flying in strong winds, rain, or fog, as these conditions can make it hard to control your drone and see where it’s going. Flying in calm, clear weather helps you maintain better control and reduces the chances of accidents. By choosing good weather, you ensure a safer flight and protect your drone from possible damage.
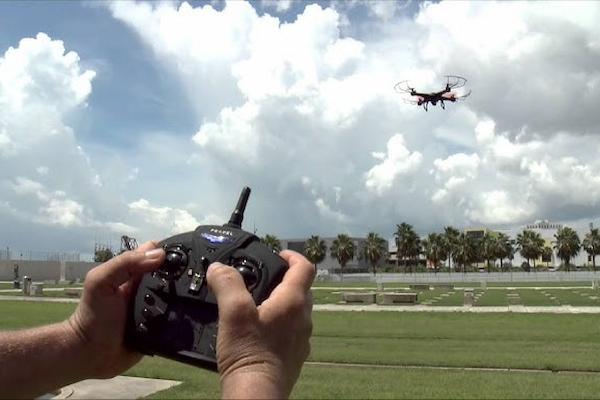
Keep Visual Contact
When flying your Sky Rider drone, always keep it within your line of sight. This means you must be able to see the drone with your own eyes, not just through the camera feed. Keeping visual contact helps you control the drone better and quickly react if something goes wrong, like avoiding obstacles or dealing with sudden changes in the wind. Staying focused on the drone ensures a safer and more controlled flight every time.
FAQs
1. Can I Connect My Smartphone To The Sky Rider Drone?
Yes. You can connect your smartphone to the Sky Rider drone if it supports Wi-Fi or a special app. Pairing your phone with the drone lets you control it, view live camera feeds, and take photos or videos from your device. This makes flying more fun and makes it easier to manage your drone.
2. How Do I Adjust The Trim Settings On The Sky Rider Drone?
To adjust the trim settings, use the trim buttons on your controller. These buttons help balance the drone’s flight by correcting any drift or unwanted movement. Gently press the trim buttons in the opposite direction of the drift until the drone hovers steadily, ensuring smooth and stable flight.
3. Can I Fly The Sky Rider Drone In Rainy Or Windy Conditions?
No. It’s not recommended to fly the Sky Rider drone in rainy or windy conditions. Rain can damage the drone’s electronics, and strong winds can make it difficult to control. Always choose calm, clear weather for safe and stable flights to ensure your drone’s performance and longevity.
Conclusion
Using a Sky Rider drone is fun and rewarding when following the right steps and safety rules. Start by carefully unboxing and setting up your drone, ensuring everything is ready for a safe flight. Paying attention to details like charging the battery, pairing the controller, and performing pre-flight checks ensures a smooth flying experience.
Always prioritize safety, follow local drone regulations, and take good care of your equipment to keep it in shape. With practice, you’ll improve your flying skills and be able to capture incredible aerial photos and videos. Remember, the more you practice and care for your drone, the more you’ll enjoy every flight.